Many do-it-yourselfers have the experience, skills and confidence that will allow them to install thin brick veneer. There are a number of thin brick installation systems that make the process very simple.
Interior Thin Brick Installaton
Installing thin brick on an interior wall or surface? Using a system like Speedymason Peel n’ Stick, you can stick most thin brick directly to the backer panel and simply add mortar to complete the installation. You probably already own all the tools you need!
Exterior Thin Brick Installation
If you are installing thin brick on an exterior project, you can use a thin brick installation system like Speedymason Brick Lath. With this system, the backer panel is applied over plywood or OSB and replaces traditional metal lath. Mortar is applied, mechanically bonding the thin brick to the Brick Lath panel. It even has a built-in water management system. Brick stays level and you can install a wall up to 2-3 times faster than traditional wire lath or panel systems!
Thin Brick Installation Techniques
Of course, nothing can replace the craftsmanship of traditional thin brick installation techniques. Here are some issues that even the most experienced handyman will want to consider before embarking on their project:
- Consult your local building authority to ensure you understand and follow local building regulations. Local authority guidelines will supersede any manufacturers’ recommended methods. Some jurisdictions require the installation of a drainage system behind the thin brick wall for outdoor applications.
- If your project is an outdoor application, be sure you understand and are confident you can install the necessary flashing and accessory materials to ensure water is shed properly.
- Use only manufacturer-approved materials and accessories.
Before you get started, we recommend you download the Thin Brick Technical Guide by the Brick Industry Institute. This guide will help ensure an installation that will look great and that you will be proud to call your own.
The guide is comprehensive but here are a few additional points to keep in mind:
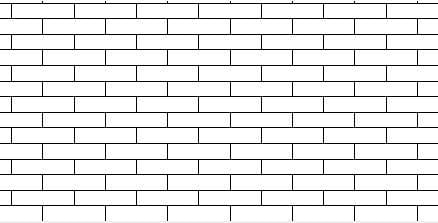
The most common pattern used when installing thin brick is the running bond pattern. That is, each successive course of brick is laid half-way over the brick below.
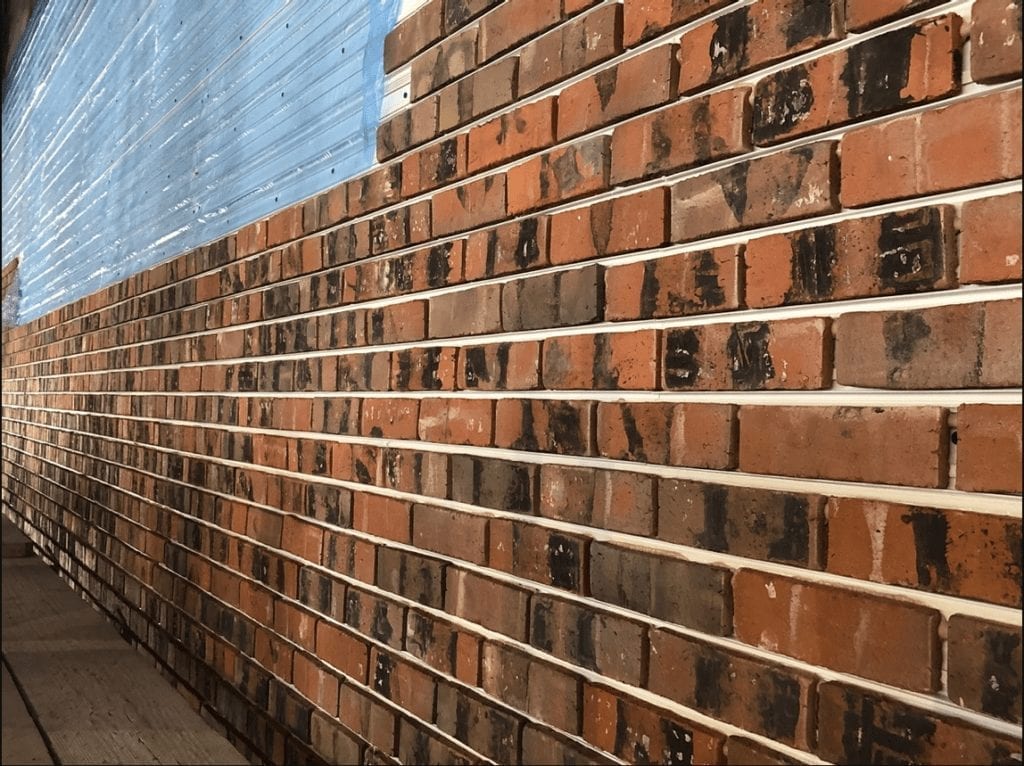
A straight and level horizontal bed joint is key to a professional-looking installation. Get started by fastening a straight-edge to the base of the wall and install the first row of thin brick along it. Snap chalk lines up the wall every few courses to ensure you maintain a level horizontal mortar joint. A 3/8” (10mm) mortar joint is standard, but the mortar joint size can be adjusted to be slightly wider or narrower as needed.
If your installation terminates at the top of a wall against the ceiling, you will want to end your top row of brick with full-height brick rather than cutting the top row of brick to fit. This provides a clean, finished look. If this is the case for you, measure the height of the wall and adjust the height of your horizontal mortar joints on the top number of rows to ensure you end with a full-height brick against the ceiling. Likewise, as you approach a window, door, or the end of the wall on your horizontal rows, you will want to end with either a full-length or half brick for a clean finish. Again, adjust the width of the last number of mortar joints so your last full or half brick fits properly. Plastic spacers that are used to install ceramic tile work well to provide a uniform mortar joint.
Brick saws may be rented from your local rental yard.
We recommend DIYers use cement-board as the substrate for your thin brick rather than the thick-set system described in the guide. Both systems work well, but cement board ensures a uniform base for the brick and is easier to install than a traditional thick-set system. Use exterior grade cement board for exterior applications and interior grade for interior applications.
Use of Polymer Modified Mortar that meets the ANSI A 118.4 both for installing the thin brick and for filling the joints between the brick. This mortar is easily mixed in a pail with a drill and paddle. The guide also approves the use of non-sag construction adhesive but for interior applications only. Regardless of which system you use, give the adhesive or mortar enough time to cure in order to avoid sagging as the adhesive or mortar cures.
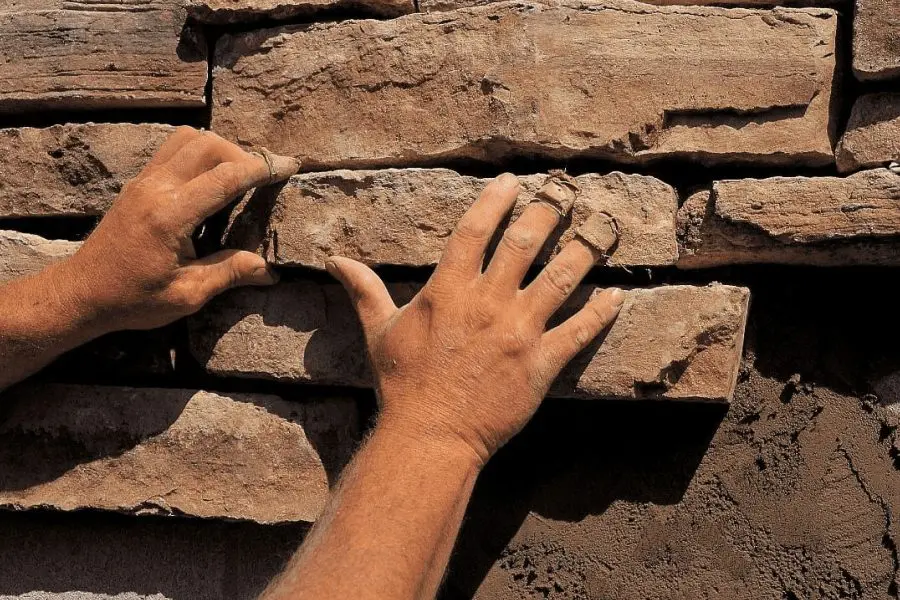
Once the thin brick is installed and is secure on the wall, the joints between the thin brick are filled with mortar. A good method of filling these joints is with a mortar bag, which is like an industrial-grade icing bag. Once installed, let the mortar dry to the point where it is still a bit soft and a finger pressed into the mortar leaves a mark. Then ‘strike’ (press and smooth) the mortar with a jointing tool to provide a smooth, concave joint. Brush excess mortar off the wall. Don’t worry about the excess mortar sticking to the brick below, if you have waited the right amount of time, the semi-hard mortar will simply fall to the floor.
Time spent practicing will pay dividends on the finished wall. Purchase some extra thin brick and mortar and set up a practice wall to refine your installation technique.
Good luck with your project. With care and attention to detail, you can create the brick wall of your dreams!